Published on
Urgent message: Recording thorough and accurate vital signs supports the urgent care physician in asking the right questions of the patient’s history of present illness, guides the physician in the physical exam, and thus is essential in reaching an accurate diagnosis and devising an effective treatment plan.
Imagine you are a medical assistant on duty in a busy urgent care center. A patient walks in, and you check him in. You ask his height and weight, but do not take a measurement yourself. You take him to the exam room and measure his temperature, pulse, and blood pressure, but not his respiratory rate. You ask him if he is having pain and chart his answer, but do not get a number from the pain scale. As the physician on duty pulls up the vitals in the electronic medical record, she sees that you have created an inaccurate chart and given an incorrect picture of the patient’s current condition.
Let’s take a close look at why recording accurate vitals, and thus creating an accurate medical record, is so important.
First, it gives the physician a true picture of the patient’s health. Recording a precise set of vital signs is important to providing quality patient care.1 In regard to medical records, as the cliché goes, “If it’s not written down, it didn’t happen.” Vitals should corroborate the clinician’s physical exam, medical findings, diagnosis, and prescribed course of treatment. Without vitals accurately recorded in the chart, a chart audit may fail to confirm the physician’s actions and findings.
Second, vital signs can be an early indicator of illness, deterioration, or impending adverse event.2 Vital signs are important for the physician when evaluating the patient. The physician can review the vital signs to determine what probing questions need to be asked regarding the patient’s condition, including its history and progression, as well as identifying next steps in evaluating and treating the patient.
Without accurate vital signs, the proper questions may not be asked, the proper tests may not be ordered, and the proper treatment may not be prescribed. For example, one patient who complained of a cough and shortness of breath could easily have her condition attributed to a virus, allergies, or asthma—but when the pulse-oximeter reading was low and an x-ray ruled out airway obstruction, the physician began to hone in on the possibility of anemia and discovered a much more serious underlying condition.
Steps in Obtaining Accurate Vital Signs
Obtaining vital signs is not invasive and should be performed using the proper techniques to assure accurate results:
- Height and weight: Ask the patient to remove their jacket and shoes. Assuming they comply, place personal belongings (eg, purses) in a secure area while the patient is weighed. Have the patient stand still on the scale while measuring weight. Record the weight without comment or judgment. Leave any discussion of weight for the physician to broach with the patient.1 To measure height, have the patient stand up to the height rod, facing you, with their feet up close to the rod. Measure their height from the crown of the head and record in the chart or electronic health record (EHR).
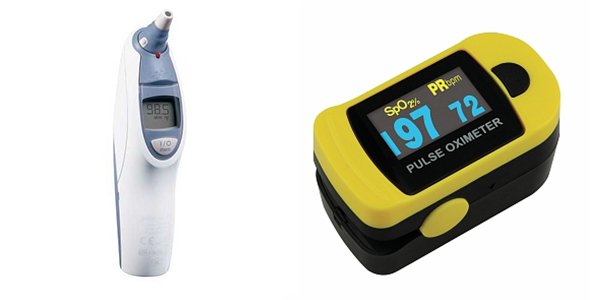
- Temperature and pulse ox: If you are using an oral thermometer, put a probe cover on it. Have the patient hold the probe under their tongue until the temperature has registered. If you are using an ear thermometer, hold the thermometer in the ear until the reading has been taken. To measure the pulse ox, place the sensor on the patient’s index finger and wait for the recording. “Normal” should be between 95% and 100%. Record findings in the chart or EHR.
- Pulse: Place your index and middle finger between the bone and tendon on the thumb side of the wrist, over the radial artery. Determine the strength of the pulse, noting whether the thrust is bounding, strong, weak, or thread. Once the pulse can be felt regularly, look at your watch’s second hand and start counting when the dial hits a round, even number. If the pulse is normal, count the number of beats in 30 seconds and multiple by two. If the pulse is irregular, count the rate for a full 60 seconds. This will give you the patient’s heart rate over 1 minute. Assess the frequency and pattern of irregularity and record along with the pulse rate in the chart or EHR.
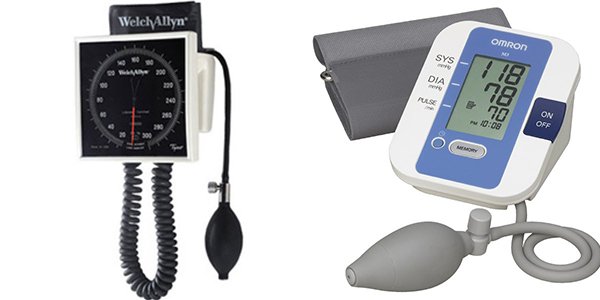
- Blood pressure: Wrap the blood pressure cuff around the upper portion of the patient’s arm. Ensure the proper cuff size is used, especially for children or patients who are large or obese. Using the stethoscope, place the diaphragm at the base of the inner elbow. This is the brachial artery. Inflate the cuff to 200 mm, then slowly release while listening for a pulse; this number on the meter will be the top number (systolic). When the pulse disappears, the meter will tell you the “lower” number (diastolic). Continue listening as the meter falls 10 mm–20 mm and then allow the remaining air to escape quickly. Use of an automatic blood pressure machine is also an option. Record the blood pressure in the chart or EHR.
- Respiration: While you are wrapping the blood pressure cuff around the patient’s arm, count the number of times the patient breathes in and out over 30 seconds. Multiply the result by 2. Record that as the patient’s respiration rate in the chart or EHR. Should the patient’s breathing rhythm be irregular (<12 or >20), count for one full minute rather than 30 seconds. Make note of any irregularities for the physician.
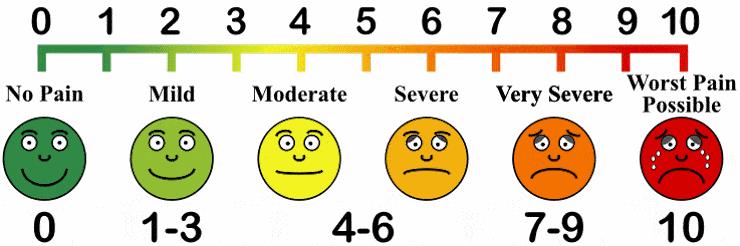
- Pain: Ask the patient if they are having pain. If so, ask them to rate that pain on a scale of 1-10, with “10” being the worst pain a patient could imagine. Use of a pain scale graphic, such as the one illustrated here, can be useful in helping quantify the patient’s pain level. Record the patient’s self-reported number in the chart or EHR.
Conclusion
It is our responsibility as medical professionals to accurately obtain vital signs. Obtaining a patient’s vital signs requires proper technique is mastered by repetitively performing the technique. Providing an accurate recording of a patient’s vital signs is not only important for the record to be accurate, but it is core to providing quality patient care.
Alan A. Ayers, MBA, MAcc is Vice President of Strategic Initiatives for Practice Velocity, LLC and is Practice Management Editor of The Journal of Urgent Care Medicine.
References
- Everestcollege.edu. Medical assistants: taking the 6 vital signs. March 2017. Available at: http://medicalassistant.everestcollege.edu/articles/medical-assistants-taking-the-6-vital-signs. Accessed March 27, 2017.
- Tysinger EL. How vital are vital signs? Available at: http://www.wakehealth.edu/uploadedFiles/User_Content/SchoolOfMedicine/_MD_Program/WFJSM/Documents/2015_May/wfjsm2015v1i1p68.pdf. Accessed March 27, 2017.
